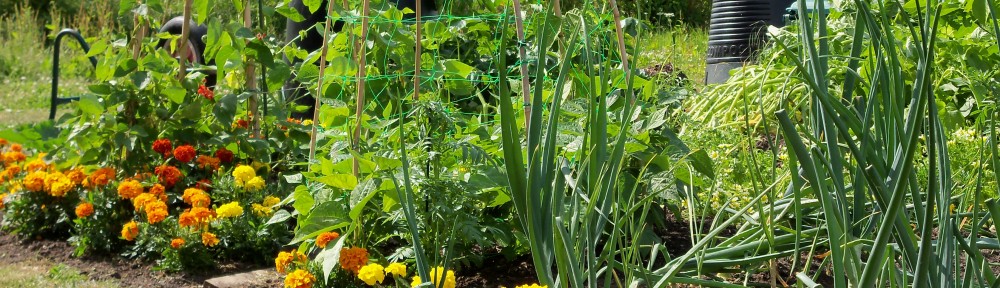
Apples

Conditions:

Apples will grow in most conditions but bear in mind that trees will be fruiting for a considerable number of years. Give them the best possible start by picking a reasonably sunny and sheltered spot that is clear of any frost pockets (late frosts may damage the blooms of early-flowering varieties). The soil should be free-draining and definitely not waterlogged or too shallow. Aside from these simple demands, apples will grow in most soils, so long as they are not excessively alkaline or acidic.

Prepare the soil well in advance and at least a month before planting by digging it over and adding plenty of well-rotted manure or garden compost to the planting site. The ground should then have enough time to settle down before the tree is moved to its final growing position. Aim to prepare an area of soil that’s at least a metre in diameter and 60cm deep as this will give your tree plenty of well-prepared root space. If you want to plant freestanding apples in a lawn, then prepare the ground as described but add an extra boost of nutrition by working in a few handfuls of bonemeal at the same time.

Planting:

Apple trees will either be supplied bare-rooted in their dormant state or as container-grown specimens. Container trees may be planted at any time of the year but bare-rooted types, while considerably cheaper, must be planted while the tree remains in its winter state, usually from October through to March (late autumn provides the optimal time to get them in the ground). Order your fruit early – September is the perfect month to do so – as you’ll be getting first dibs on the fullest selection of varieties. Opt for a two- or three-year-old tree as these will already be partly trained.

Planting in the open ground involves digging a hole into the prepared soil that is large enough to accommodate the roots, then simply positioning your tree, filling back with soil and firming it in to make sure that the earth is in complete contact with all the roots and that there are no air pockets which might cause the tree to rock in the wind. There are a number of other considerations too. Firstly, do not add any extra fertiliser at this stage as you will only encourage soft growth at the expense of fruit production. Secondly, make sure that the union between the rootstock and scion – which can be identified from the distinct bulge in the stem – sits about 10cm clear of the ground; taking care to match the new soil level with the level the tree was buried to in its nursery pot, or to the soil mark on its stem, will be a foolproof way of doing this.

Most trees and all varieties on a dwarfing rootstock (M27, M9, M26 – see box: Rootstocks) will need support. Before planting your tree drive a 5cm-diameter stake into the bottom of your planting hole so it sits at least 30cm beneath its base. Place it at a 45° angle so it faces the oncoming prevailing wind and site it about 7cm from the stem of the tree. After filling back your planting hole and firming the earth in, loosely connect a tree tie 10cm from the top of the stake to the stem of your tree. Tighten it up after a few weeks once the tree has settled in. As the tree grows and its stem thickens you will need to periodically loosen the tie to stop it from cutting into the bark.

Care:

Trees will need watering in dry spells, particularly as they are establishing and as their fruits begin to swell. Older and larger trees will be better able to cope with drought but apples in containers will always require a steady supply of water. It is worth applying a mulch of manure or compost in early spring to help retain moisture and suppress weeds. This will also rot down to add valuable nutrients to the soil. Before applying the mulch, sprinkle some general purpose fertiliser over the ground to cover an area slightly larger than the diameter of the tree’s crown, which will roughly mirror the spread of the tree’s roots.

Left to their own devices apples will form lots of fruit one year and fewer the next in a natural cycle of plenty then famine. Leave all fruits to grow on and you also run the risk of lots of apples but all of a small size. Young fruitlets naturally fall away in early summer during the ‘June drop’ but extra thinning can help. Begin by removing the central ‘king apple’ at the centre of each cluster of fruits as this rarely forms a pleasing shape. Then thin the remaining fruits to leave 10-12cm between apples of dessert varieties and 15-25cm between larger cooking varieties. Smaller trees such as minarettes and dwarf pyramids won’t need much thinning, so only remove fruits if it looks like you’ll otherwise have an excessively heavy crop.

Harvesting:

There’s a simple, fail-safe technique for testing when your apples are ready for picking: cup an apple in the palm of your hand and gently lift it upwards while twisting at the same time. If the apple comes away readily from the spur then it is ready to pick. Never pull an apple vigorously from a tree, as this could cause damage. If you do harm any, eat them within a few days as they won’t keep successfully.

The earliest varieties of apple should be eaten fresh rather than kept over long periods of time. Late varieties that are specifically described as suitable for storage must be prepared before they are packed away. Wrap each apple in old newspaper and store the fruits in open trays. The newspaper will keep them dry and prevent the apples from touching and spreading disease. Always handle your apples with extreme care so as not to bruise them. Your apple store should be cool but frost-free, with minimal temperature fluctuations and devoid of strong-smelling paints or other industrial liquids that could taint the apples’ flavour. Garages, cellars or an unheated spare room make ideal storage spots. Check over stored apples weekly to inspect them for any signs of rotting or brown patches and remove these immediately as problems can spread rapidly between fruit kept in storage. Some of the best keeping varieties can be stored right through to April.

Pruning:

There are a number of ways to grow your apple trees, such as: wall-trained espaliers with parallel horizontal branches; single-stem cordons against wire supports; fans trained to fill a wall or fence; free-standing as a simple dwarf pyramid shape or as a more rounded bush tree. This section explains how to prune free-standing trees to create a space-saving dwarf pyramid. If you can only plant in containers or are looking for an even simpler alternative then try the compact columnar shape of minarette apple trees, which can be planted in the ground as close as 60cm apart. These have a vertical stem with multiple short, fruit-bearing spurs and will require minimal pruning. They are also available with more than one variety grafted onto the plant’s rootstock.

Dwarf pyramid trees will require pruning immediately after planting to encourage a good, even ‘Christmas-tree’ shape. Ask your fruit supplier for a ‘feathered maiden’ tree as this lends itself well to the formation of a pyramid. The central leader (the main stem of the tree) will need to be cut back to leave 25cm of growth. Make the cut just above a bud that is pointing in an upward direction. The other branches should then be pruned to 20cm in length – make the cut just above buds that are facing outwards and upwards.

The next pruning takes place in late summer when the bottom third of each new shoot has turned woody and the leaves have taken on a dark green colour, indicating maturity. The summer pruning process uses the ‘modified Lorette system’, which sees pruning only of shoots that are longer than 20cm. Begin by cutting back sideshoots emerging from new growth to just three leaves above the cluster of leaves closest to the stem (these are known as the ‘basal cluster’). Sideshoots emerging from older wood that has not been produced in the current year should be cut back to one leaf above the basal cluster. New shoots emerging after this summer pruning should be cut back to one bud in September. As well as completing this modified Lorette system of pruning, in this first summer’s pruning you should reduce the length of the main branches, other than the central leader, to six leaves above each branch’s basal cluster.

Subsequent winter pruning sees the central leader cut back to leave 25cm of last season’s growth to maintain its size, followed in the summer by the modified Lorette system of pruning.


Runner Beans

There are many different types of bean available:

Climbing French Beans – French beans tend to be on smaller, more tender pods than runner beans. The immature pods are eaten whole, the semi-mature pods are shelled and the beans inside are eaten and ‘flageolets’ and the mature pods can also be shelled and eaten fresh or dried and stored, these beans are like kidney beans. Climbing varieties can reach up to 2.5m in height and are best grown up canes.

Dwarf French Beans – the same type beans are produced as on the climbers (above) but on more compact plants, generally about 45cm tall. These are good for growing in containers.

Runner Beans – Runner beans have a more pronounced flavour than French beans. The plants are more prolific (some can grow up to 2.5m tall) and the beans produced are very long and flat.

Dwarf Runner Beans – These produce beans just as good as on the large runner beans, only on very compact plants. These varieties are actually quite ornamental in containers.

When to Sow Beans Any beans from seeds: April – June

Any beans from young plants: Plant in May

Harvest Time Runner beans grown from seed: July – September Dwarf French beans grown from seed: June – October Climbing French beans grown from seed: June – August Dwarf French beans grown from young plants: July – August Climbing French beans grown from young plants: July – August Runner beans grown from young plants: July – September

Site and Soil Beans are happy in most soil types, but they do require it to be well dug. Their roots don’t like compacted soil, so before plants make sure the soil is loose to a depth of around 30cm.

Position beans in a sunny but sheltered spot, if possible. Because of their height, they can suffer from damage in very windy areas.

Provide canes or a combination of canes and Pea & Bean Netting for the beans to grow up (not necessary for dwarf varieties).

How to Grow Beans from Seeds

Sowing Beans can be sown directly outside or, if you’d prefer to start harvesting slightly earlier, you can start them off indoors and then plant them out in May.

To sow indoors, sow two seeds per 9cm pot or Rootrainer in April. Seeds should be sown 5cm deep. Leave to germinate on a windowsill, propagator or in a greenhouse and plant out into growing position once the roots fill the pot.

When planting outside, position the bean plants 15cm apart, making sure that a wigwam or climbing structure is in place for them to grow up.

Seeds can be sown directly outside at spacings of 15cm and a depth of 5cm from April in warm areas. Beans can be sown in rows (for criss-cross growing frame, or circles for wigwam growing frames).

Harvesting Harvesting Runner beans and French beans is fun and easy. Pick them from the plant whenever they reach the desired size – the more you pick, the more will grow. If you have too many to eat in one go they can be frozen for use at a later date.

If Runner or French beans are left to grow a bit too big, they can be shelled and used at the ‘Flageolets’ stage.

Storing The easiest way to store broad beans is by freezing them. This way they can be used cooked or defrosted as and when needed. Beans can also be shelled, dried and stored in air-tight jars.

Bean Pests and Diseases Runner and French beans can be susceptible from the following pests and diseases:

Slugs – Slugs are attracted to the young plants.

Blackbean aphid/blackfly – Young shoots are often covered with masses of black aphids. These growing tips can be snipped off and disposed.

Bean Seed Fly – Can prevent germination and attack seedlings. They’re at their worst in cold, wet soils. They can be prevented with Insect Netting until germination has taken place.

Pollen Beetle – may attack open flowers. It’s best not to control them with chemicals, but they shouldn’t cause a problem with your crop.

Garlic

When to Plant

  • Autumn varieties: September – December
  • Spring varieties: January – March

Harvest Time

  • Autumn varieties: May – July
  • Spring varieties: June – August

Site and Soil

Garlic needs an open, sunny site with light, free-draining soil. Avoid planting garlic in very heavy or freshly manured ground. Garlic responds well to potash, so if you have any available wood ash you can make use of it by digging it in to your soil. Or, for best results, use a pre-planting garlic fertiliser as well.

How to Grow Garlic from Bulbs Planting Both autumn and spring varieties can be planted straight outside into prepared soil. Break the bulbs into individual cloves. Loosen up the soil in the planting area, add some pre-planting fertiliser and work it into 10cm ridges. The cloves should then pushed into these ridges about 15cm apart (pointy-end up) at a depth of about 2cm.

Garlic prefers light soil, but where this isn’t available dig a generous amount of grit into the planting area to ensure any water can drain away from the bulb.

Growing

Garlic benefits from watering during dry spells in the middle of summer. Once established, garlic requires little attention other than occasional weeding and feeding with a liquid feed. Hardneck varieties produce a flower stem which, if cut off 3 – 4 weeks before harvesting, can increase the bulb size by up to 20%.

Harvesting

If you want to eat your garlic ‘green’ or ‘wet’ you can harvest it around May to June, when the foliage is still green. Don’t lift all your crop early because it doesn’t store for long and won’t dry out successfully. Autumn-planted varieties are better for lifting early because they have had longer to establish.

Alternatively you can harvest garlic at the traditional time, once the leaves start to turn yellow (around mid to late-summer). The easiest way to lift them is by pushing a hand or border fork into the ground next to them and easing them out of the ground.

Storing

Once you have harvested your garlic bulbs, the best way to store them is by drying them out, this usually takes about a week to do, ideally in sunny, breezy conditions.

Dry garlic by hanging in bunches or plaited, or laid on wooden shelves. For those drying out by lying on benches, cut off the stems down to about 2cm. Bulbs left in the soil for another winter  tend to re-sprout the following spring and produce clusters of flavoursome leaves which can be used like chives.

Garlic Pests and Diseases

  • Rust disease – rusty spots form on the leaves, sometimes killing them off completely, often resulting in smaller bulbs size. This commonly happens when the growing garlic sits in damp soil for too long, it can also happens if grown in soil where either onions, garlic or leeks have been grown before. There isn’t a cure for rust disease, but if you see any leaves with rust-coloured spots on, remove them and throw them away to help prevent the rust from spreading. Don’t grow garlic, onions or leeks in areas that have been affected by rust – avoid these areas for 4 to 5 years as the spores can be active for years.
  • Onion white rot – the leaves turn yellow and wilt, preventing the bulb from forming properly. The bulbs will have white, fuzzy spots on if they have onion white rot. There isn’t a cure, the best thing to do it remove the bulbs from the area completely to avoid the disease spreading.
  • Onion fly – the leaves start to wilt and turn yellow, preventing the bulbs from developing. Onion fly can affect garlic and leeks as well as onions. The larvae of onion fly live in the soil and eat the roots of the bulb, and eventually burrow into the bulb itself. Discard any bulbs you discover with onion fly..

Carrots

There are different types of carrot available, each offering different qualities:

Early Summer Varieties These can be sown from as early as February and take about 3 – 5 months to grow. They’re mostly eaten fresh but they can be stored in the ground. Early varieties are available in the following types;

  • Round/square-rooted – suitable for difficult soils.
  • Amsterdam  – pointed and narrow, excellent raw.
  • Nantes – Large and cylindrical.

Maincrop Varieties Produce a later harvest than the early varieties and can store in the ground throughout winter until as late as March. Maincrop varieties are available in the following types:

  • Chantenay – Medium-sized, reputation for good flavour.
  • Berlicum – large, cylindrical, matures late.
  • Autumn King – large, tapered shape and high yielding.
  • Intermediate – long, large roots.
  • Imperator – Thin roots with a very sweet flavour. Great for eating raw.

When to Sow Early summer varieties: February – August Maincrop varieties: April – June

Harvest Time Early summer varieties: June – November Maincrop varieties: September – March

Site and Soil Carrots are a bit particular about where they grow, but if you’ve got the right site for them you’ll find it easy to achieve a successful harvest with them. Carrots thrive in light, deep, fertile, stone-free, well-drained soil and don’t do well in heavy clay soil. The roots tend to fork in freshly manured ground so it’s best to mulch the area several months before sowing.

How to Grow Carrots from Seeds Sowing You can start sowing early summer varieties from February but it’s advised that you cover with cloches for small tunnels to warm the ground slightly for the first month or so. For the longest lasting harvest of early summer varieties, sow successionally throughout the summer, i.e. sow a new row every month. Maincrop varieties can be sown from April.

Sow into drills in well prepared, fine soil. The drills should be 1 – 2.5cm deep, in rows about 30cm apart.

Growing Carrots are very susceptible to weed competition in early stages, so weed seedlings carefully.

Once the carrots are established, the carrot foliage blanket the soil so weeding isn’t as urgent. Carrots don’t require much watering, but it’s a good idea to not let the soil dry out completely because that can cause your carrots to split if it suddenly rains very heavily.

Once the carrots start to grow and become densely packed in their rows that will need thinning out. The smell released when thinning notoriously attracts carrot root fly (one of the worst problem pests with this crop), so it’s worth bearing this in mind when sowing. Try to sow as thinly as possible to prevent the need for thinning out altogether.In most cases it is necessary to thin the carrots out, no matter how thinly they’ve been sown. They should be thinned to a distance of 3 – 5cm (or slightly less for narrower varieties).

Harvesting You’ll be able to tell when you’re carrots are ready for harvesting because you’ll be able to see the ‘shoulder’ of the carrot just above the soil surface. They can be left in the ground until they reach the required size, or left to store there until needed. In light soil pull out roots carefully as they reach the required size. In heavier soil you’ll need to push a fork into the ground next to them and gently leaver them out.

Storing Carrots withstand light frost, but are damaged by heavy frost. They can be stored in the following ways:

  • In the ground – This is the best method for retaining flavour, but is best in light, well drained soil. Allow the foliage to die back, or cut back foliage from early November if it hasn’t yet died back, and cover with black polythene to keep it dark and to keep the rain off. For additional protection you can include a layer of cardboard underneath the polythene too. These can be dug up and used when required.
  • Indoors – Lift the carrots before the first heavy frost. Cut the foliage off and lay them in rows in cardboard or wood boxes, each layer separated by a layer of sand. Carrots can be pulled from the box when required

Carrot Pests and Diseases: Carrot fly – avoiding carrot fly is very tricky. This is where flies lay eggs at the base of the plant: when hatched tiny maggots tunnel into the roots leaving them holey. There are a number of methods that can help prevent them:

  • Sow thinly – this can reduce need for thinning out, which creates a smell that attracts carrot fly.
  • Choose resistant varieties –varieties such as ‘Resistafly’ hove shown to be less popular with carrot fly.
  • Grow next to onions – the smell of onions can deter carrot root fly, so planting alternate rows of carrots and onions may be effective.
  • Grow high up – it’s thought that carrot fly stay close to the ground so goring them in a raised bed, bench or window box at least 1m from the ground may work.