Courgettes

Conditions

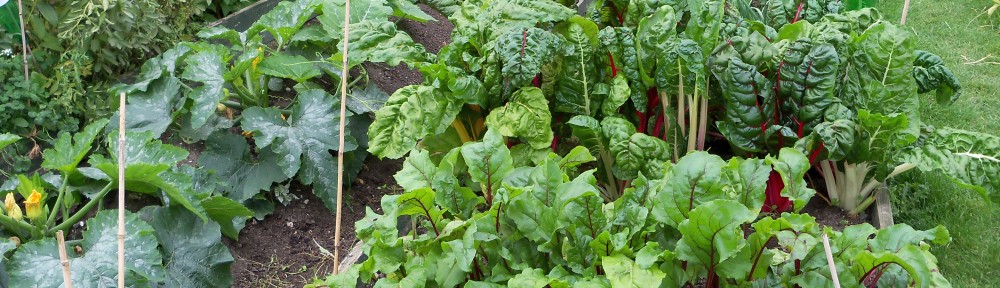
As they originated in Mexico’s warm climate, it will come as no surprise that courgettes need a sunny, sheltered position in order to ensure the best possible growth. The soil should be fertile, moisture-retentive yet free-draining. They are heavier feeders than most other crops, so the richer the soil the better their performance will be.

Thankfully, even the poorest spot can be prepared to provide suitable conditions. The best way to do this is to dig out a 30cm square hole to one spade’s depth where each plant is to be positioned. Space the holes at least 60–75cm apart. Fill the bottom third of each hole with well-rotted manure or garden compost and then backfill with soil. Do this at least two weeks before planting or sowing to give the soil enough time to settle back down. Don’t worry if you’re left with a mound over each planting hole – this won’t pose a problem and will reduce on its own with time.

Alternatively, dig out your planting holes in late autumn and line them with old cardboard. Infill the holes with compostable material, such as kitchen waste, as you produce it. When the holes are a third full, backfill with soil. These ‘compost pits’ of raw organic matter will feed the hungry plants.

Sowing

Seeds can be sown directly into their final planting position or under cover for extra warmth. If slugs are a problem in your area, then start off seedlings indoors or in the greenhouse to give the plants a head start and reduce the chances of an early attack.

Raising seedlings under cover is generally more reliable as the conditions of early growth can be closely monitored to give a steady, even growth rate and strong young plants. Sow two seeds into 7cm pots of multi-purpose compost. Water these and place them in a propagator to germinate or onto a warm windowsill. The seedlings will push their way through in as little as a week. Sowings under cover should be made around one month before the last frost, from about mid April to early May, so the seedlings will be ready to plant out once the weather has improved.

If you opt to sow the seeds outside, wait until any danger of frost has past – late May in the south and up to early June further north. Warm the ground with cloches, if possible, or use clear plastic drink-bottle halves placed over the soil to create a mini greenhouse (these are also great for keeping slugs at bay). Push two seeds about 2cm into the soil, edge side down, and water them in.

Growing

Once the fat-leaved seedlings have emerged allow them to grow on for at least two weeks before removing the weakest and leaving a single plant in each pot or planting position. The young seedlings will soon go on to form their first adult leaves. Keep cloches or plastic bottle-halves over outdoor seedlings in these early stages to encourage strong growth while the weather continues to warm up.

Pot-raised seedlings should be transferred to larger, 12cm-diameter containers as soon as roots begin to poke out from the bottom of the drainage holes. Use multi-purpose compost and keep them in a bright position at a minimum temperature of 15°C. Begin to harden the young plants off about two weeks before planting out time. To do this, place them outside for increasingly longer spells and during milder nights to toughen them up. To plant, simply remove them from their pots and carefully lower them into planting holes at the same depth they were at within the pot. Courgettes can also be cultivated in grow bags, but you will only be able to place two per bag and they will need far more watering than crops such as greenhouse tomatoes grown in the same way.

To help with watering, insert a plastic pot, open side up, into the soil close to the stem of the plant. Your water and liquid feed can be poured into this pot, which will dispense it in a controlled flow from its drainage holes. Another option is to bank up the soil in a 5cm ridge around the edge of the planting position to create a reservoir which will be flooded during watering. This will stop the water running straight off the surface of the soil, and is particularly useful for soils that can bake dry and hard.

Courgettes are greedy plants, so the two golden rules are to water well and keep them fed. The former is especially important once the plants begin to flower and as they develop their fruits, as the amount of water is directly proportional to the speed of fruit production. In the height of summer each plant will need as much as 10 litres every week, so a good soaking every other day is vital. Apply a mulch in hot weather to lock in the moisture and keep weeds down. Garden compost, grass clippings or manure will all work, but be sure that the mulch does not touch the stem of the plants or the concentration of nutrients could harm them.

Towards the end of the season some of the leaves may take on a dusty grey appearance. This is the fungus powdery mildew and although it isn’t ideal, in small doses it does little to affect the productivity of plants. Good levels of water will help keep this to a minimum as plants will grow stronger. In nutrient-rich soils that have been further enriched with manure and compost there will be little need for extra feeding during the growing season, but on sandy soils plants will benefit from an organic liquid feed, such as comfrey tea or liquid seaweed, every two weeks.

Picking

Correct picking of courgettes is almost as important as all of the nurturing of the plants up to this point. With the right conditions you’ll be tucking into homegrown fruits as soon as 12 weeks after sowing. And once you start, the plants will keep cropping for some time to come.

Pick the fruits while they are still young, at about 10cm in length. Baby courgettes – those posh packets of slender fruits you’ll find in the supermarket with the flowers still attached – can be enjoyed even earlier. Try them dipped in batter and fried (perhaps even stuffing the flowers Italian-style with a little cheese and slithers of anchovy). Once you harvest the first courgettes keep picking them, as this will ensure the plants continue producing fruits. Thoroughly check over each plant at least three times a week and cut off the courgettes using a sharp knife. Hold the fruit with your hand while removing it and do not tug at the plant.

Courgettes are best enjoyed fresh but will keep for up to a week in the fridge. Male flowers tend to appear a little earlier than female blooms. The latter have a slight bulge immediately behind the flower (this is the embryonic fruit). The earliest male flowers can be fried as above and will offer a tantalising glimpse of the bounty to come. Always pick excess fruits and, if you can’t manage them all, slice them up and blanche them for a minute before drying them off and packing them into polythene bags for the freezer.

Beetroot

Conditions

Beetroot grows best in a sunny, open position in light to medium earth. If the plot was manured for a previous crop, then no extra organic matter needs to be added – if it wasn’t, dig over the soil adding a small amount of compost.

Soil with a high clay content is less ideal: beetroot can struggle to form properly due to its denseness, and it can become over-saturated in wet spells and dry out too quickly in warm ones. But you can significantly improve your chances of getting a good crop of beets by incorporating a much more generous amount of compost into your bed than you ordinarily would. This will improve its structure, enabling it to hold moisture better in the summer and warm up quicker in the spring.

You should do this as far in advance of sowing as possible, to enable the organic matter to break down and become fully incorporated into the earth. Beetroot also prefers a neutral soil with a pH of between 6.5 and 7.5.

Sowing

Beetroot grows best in a sunny, open position in light to medium earth. If the plot was manured for a previous crop, then no extra organic matter needs to be added – if it wasn’t, dig over the soil adding a small amount of compost.

Soil with a high clay content is less ideal: beetroot can struggle to form properly due to its denseness, and it can become over-saturated in wet spells and dry out too quickly in warm ones. But you can significantly improve your chances of getting a good crop of beets by incorporating a much more generous amount of compost into your bed than you ordinarily would. This will improve its structure, enabling it to hold moisture better in the summer and warm up quicker in the spring.

You should do this as far in advance of sowing as possible, to enable the organic matter to break down and become fully incorporated into the earth. Beetroot also prefers a neutral soil with a pH of between 6.5 and 7.5.

Growing

Once the seedlings have surfaced, thin them to leave just the strongest where each seed pod was sown. When they have reached about 5cm in height they can then be thinned to their final spacings. This is one plant every 10cm for globe-type beetroot, or one every 15cm for the larger, long-rooted cylindrical types (see varieties to try box, right).

Seedlings may need protecting from birds, which will find the young leaves irresistible – pigeons are particularly prone to helping themselves to the foliage. If they are a problem in your area then place netting over the young crops. This can be removed once the plants are a bit bigger.

Sowing early on in the season will mean cold nights, conditions that can cause crops to ‘bolt’. To be on the safe side, use a bolt-resistant variety for early sowings such as the aptly-named ‘Boltardy’

Care

Beetroot are undemanding once the seeds have successfully germinated and the resulting seedlings have been thinned to their final spacings. Your main consideration should be that the plants are kept moist at all times, which means checking on the crop most days in hot, dry weather. Any that are allowed to dry out or that are watered in a haphazard way will tend to form woody roots, so be sure to give them a good soaking each time you water them. This will also hasten the time to harvest and produce bushier top growth for the tender, spinach-like bonus crop.

Weeds shouldn’t present too much of a problem thanks to the speed of beetroot growth, but larger ones are best removed to allow the plants to grow unhindered. Pests aren’t much of a worry either – only roots left in situ over winter for lifting as required (see box) are likely to suffer any real damage from slugs and snails. For that reason, from October onwards you should put cloches over any beetroot plants that are still in the ground.

Harvesting

The first swollen roots may be harvested once they reach the size of a golf ball, which can be as little as two months from sowing. They will be at their most tender at this early stage. Lift every other plant as needed so that the remainder can grow on to reach their full size – once they have, they can be lifted to use as needed but before they have reached about 7cm across, or the size of a tennis ball, otherwise they will start to become tough and woody. Don’t forget to eat the foliage too – steamed is best for a healthy shot of goodness.

To lift a beetroot, ease it out using a hand fork or trowel while firmly holding the foliage. Take care not to damage the root itself as it will be liable to ‘bleed’ some of its juices and therefore be unsuitable for storage.

Roots destined for winter storage should be at tennis ball size – anything smaller will start to shrivel too quickly once it’s out of the ground. Store them in boxes of just-damp sand in a cool, dark and dry place that is also well ventilated: a garage or frost-proof shed, for example.


Brussels Sprouts

Conditions

Brussels sprouts can grow in sun or partial shade, making this a useful crop for those slightly trickier parts of your plot. Always pick a fresh area of ground where you haven’t grown brassicas for at least two years; this simple requirement will help to reduce any nasty surprises coming from pest and disease build-up in the soil.

Diligent ground preparation is essential as sprouts need a firm, neutral to alkaline soil if they are to grow well. Pick a well-drained position and begin improving the growing area the autumn or winter before sowing. Dig the soil over and incorporate ample organic matter in the form of well-rotted manure or garden compost. All members of the brassica family are very heavy feeders and need lots of nitrogen to grow, so it’s hard to add too much of this. Dig the organic matter into the soil and leave it to settle over winter. Ideally, brassicas should follow on from an earlier crop of peas or beans, as these two crops are members of the legume family, which enrich the soil by taking nitrogen from the air and fixing it in their roots. This free source of nutrients can then be exploited by your hungry Brussels sprouts.

About a month before sowing, check the pH of your soil. If it is anything below 6.5 you will need to add lime to raise the pH so it is no longer acidic – aim for a pH of 7 or higher. Sprinkle the lime over the soil surface soil and allow rainfall to wash it down. Do not dig it in or you will fluff up the ground, which should have become nicely firm by now. Gardeners growing on clay will find that lime has the added advantage of causing the fine soil particles to group together, helping drainage to improve.

Sowing

Brussels sprouts are best started off in a seedbed and planted into their final ‘permanent’ plot once they have grown on a little. This enables a spring-time crop to be sneaked in before the sprouts take up their final positions plus the plants will develop a stronger root system when transplanted. To prepare your seedbed, begin by raking it over and pulling any stones or debris to the side to leave a level surface. To sow, draw drills into the soil using a garden cane. The drills should be about 1cm deep and spaced 15cm apart. Sow the seed very thinly to avoid overcrowding and undue waste. Cover the drills back over with soil and water along the rows using a watering can fitted with a rose.

The best time to complete your sowing is from late March to mid-April, depending on the temperature in your local area. If the soil is still cold and wet, leave sowing for another few weeks. There is little advantage to be gained from starting the plants off earlier, as they’ll need to be transplanted sooner when other crops may still be in the ground. Early sowings also increase the chance of sprouts appearing too soon in the season, when warm summer weather may cause them to unravel and lose their culinary appeal.

Growing

Seedlings should appear within about 10 days and from this point onwards your seedbed will need to be kept moist. Once they are 2cm high, thin them to a spacing of 5-7cm. When they reach 10-15cm tall, which will be about five to six weeks after sowing, it is time to transplant them to their permanent bed. Give this area a final boost just before transplanting time by sprinkling over a general purpose organic fertiliser, such as blood, fish and bone meal.

To transplant your young plants, thoroughly water them the day before and try to preserve as much of the seedbed soil around the root system of each one as possible to minimise disturbance. Push a hole into the new bed using a dibber and carefully re-plant them, pushing the soil back around the roots. They will need to be well firmed in, so either press down around each plant with your hands, or insert a dibber next to the plant and rock it back and forth to push the soil tightly up against the roots. Your seedling should offer enough resistance so that when you try to lift it out of the ground by a leaf, the leaf tears off before the plant is uprooted. Space plants 60-75cm apart in both directions, or 45cm apart if you are growing a more compact variety. Water the Brussels sprouts in to settle the soil around the roots and, if cabbage root fly has been a nuisance in the past, consider placing a brassica collar around each plant to stop the female flies accessing the base of the stems to lay their eggs.

Care

Look after your Brussels sprout plants and they will reward you with the biggest possible harvest. Keep them well-watered during dry spells so they are not struggling for sustenance. Maintaining a weed-free bed will also help, but you will need to remove unwanted plants by hand to avoid damaging the shallow root system. By August or early September, nitrogen levels in the soil may be running low and it is at precisely this time that the sprouts are beginning to swell. Maintain the momentum by sprinkling a couple of teaspoons of dried blood or a similar nitrogen-rich fertiliser around each plant.

Brussels sprouts can be susceptible to a number of pests, but the good news is it’s easy to keep most of them at bay. Pigeons may rip off the tender young leaves, while the cabbage white butterfly is likely to make an appearance. The latter lays its eggs on the plants and the caterpillars that emerge can munch their way through the leaves at a shocking rate. Banish both from your crop by supporting fine netting over the plants soon after transplanting time. Special brassica netting is available which can be draped over a grid of upturned plant pots on top of bamboo canes to keep the netting well clear of the plants.

Harvesting

Depending on whether you are growing an early or late variety, your Brussels sprouts could be ready for harvesting from September to March. Begin picking your sprouts as soon as they reach about 2cm wide. At this point, the veg will still be tight and at their sweetest. The lowest sprouts on each stem will be ready first, with those further up maturing later on; this means that a few sprouts should be picked from each plant at a time, rather than stripping a single stem bare in one go. To remove individual sprout buttons without damaging the plant, firmly snap each one downwards.

As your Brussels sprouts mature, remove any yellowing leaves that appear, as these may act as a source of infection. Enjoy the veg fresh or freeze them by blanching them for a couple of minutes in boiling water, plunging them in cold water to stop the cooking process and drying them off before packing them into plastic containers for the freezer. Frost improves the flavour of traditional varieties, but this makes little difference to modern F1 hybrids. To encourage the final sprouts to ripen, remove the top of each plant, which can be enjoyed as a leafy green vegetable in the same way as cabbage. Spent plants are very woody so they should be cut up before they are added to the compost heap.


Asparagus

Conditions

Meticulous ground preparation is essential if asparagus is to thrive. Remember that you are effectively laying the groundwork for two decades of growth, so time spent now will be repaid many times over in the years to come. There is little point rushing this job!

Asparagus prefers a free-draining but nutrient-rich soil that’s not too acidic. Aim for a pH of around 6.5-7.5, adding lime to the soil if yours is below this. Pick a position in full sun, free of frost pockets, where the plants can grow undisturbed and protected from strong winds. Some shade is tolerable but you will get a better performance when plants can draw on good, steady sunlight. Bear in mind that young trees and shrubs nearby may grow larger to eventually cast shade over your asparagus crop. Plants may be grown in any plot that satisfies the above requirements, but heavy clay that hasn’t been improved in the past may prove a challenge. Consider dedicating an entire raised bed to asparagus in these circumstances, when the extra depth of soil will make all the difference.

Prepare the ground the autumn or winter before planting by digging in ample well-rotted manure or garden compost – at least a bucketful per square metre. About a week prior to planting, rake in a general-purpose organic fertilizer, such as bonemeal to give the soil a final boost for your new introductions.

Growing

You can grow asparagus from seed or by planting rootstocks (usually one year old) called ‘crowns’. Growing from seed is cheaper than starting from crowns but you’ll have to wait another year before you can begin harvesting. Considering a bunch of supermarket asparagus costs as much as two ready-to-plant crowns, in most circumstances the latter option is well worth the investment.10 crowns costing about £15 should supply more than enough spears for the average family.

Crowns are generally planted in late March or April into prepared ground, though you can establish them in the autumn, too. Whether growing in raised beds or open ground, begin by digging out a trench 20cm deep and about 30cm wide. If your soil hasn’t been cultivated much in the past, an additional layer of compost or manure may be placed into the bottom of the trench then covered with a similar depth of soil to add more nutrients for the roots to grow into. Now add a line of compost along the bottom of your trench to create a raised mound. This will lift the buds of the crowns above the roots and help excess moisture to drain away from the delicate buds. Make sure that the roots are completely hydrated by soaking them in a bucket of water while you prepare the trench.

Set your crowns into the trench at least 30cm apart, straddling the roots either side of the raised mound, then fill back the soil so that the buds sit just beneath the surface. The trench can be filled in gradually during the growing season as the shoots grow, so that by autumn the level of soil in the trench will match that of the surrounding ground. If you intend to grow more than one trench then set these 45cm apart to give each row plenty of space.

Care

Each spring, just before the crowns launch intro growth, apply a generous handful of organic fertilizer around the base of each plant to give it a boost. A further feed later on in the season may be applied after the cropping period to recharge the exhausted soil. Early shoots will need some protection from late freezes to keep them in good condition – be on hand with fleece if a frost threatens.

The spear cutting period runs from about early April to mid June, after which time the spears should be left to grow on to unfurl into the beautiful fern-like foliage. As this continues to grow you may need to protect it from wind damage. A simple perimeter of canes and string will keep the foliage propped up and safe from snapping. Although the mature foliage may seem of little consequence to the food grower it has a vital role, trapping the sun’s energy and channelling it back down to the crowns for next year’s crop. Protecting this foliage will safeguard future harvests

Harvesting

If you simply can’t wait to make a harvest then a few spears may be taken in the second year following planting. Cut just one or two per crown and stop here. It may seem like a waste to allow the remaining shoots to go uncut, but the first few years are about establishing a healthy root system that will secure the plants for the future. Patience really will be rewarded, so bear with this establishment phase.

Of course, from the third year you can begin cutting in earnest. The first spears nudge through the ground from about early to mid April. Allow a cutting period of eight weeks from this point, taking the last cut in about mid June to let the foliage develop and recharge plants. Spears may be cut once they reach about 10-15cm high – leave them to grow longer and the outer skin becomes tough and will need peeling. To cut, insert a knife next to the spear and cut it off 5cm below ground level so you get some pure white stem with the spear. Any sharp, serrated blade will do the job but special asparagus knives will help as they are purpose-designed for the task, giving a good angle for a clean edge. Cut all the spears – thick and thin – because it is this harvest that stimulates new shoots to appear.

Of course, asparagus is best enjoyed as fresh as possible and will be bursting with flavour and nutrients at the point of harvest. If you want a bigger batch of spears then a previous cut may be kept in the fridge for up to a week while more are gathered. Stand the spears upright in 2cm of cold water before placing the whole container into the fridge. They will also freeze very well after being cut into sections and blanched in boiling water for a couple of minutes beforehand. This gives a great excuse for growing more crowns than might otherwise be enjoyed in the short cropping season – and who could ever tire of this decadent vegetable?!